Run the First Edition of Unix (1972) with Docker
In this article you'll see how to run a PDP-11 simulator through Docker to interact with Unix as it was back in 1972.
One major benefit of Docker is you can run packaged up services without having to install them (or their dependencies) directly on your main OS.
That’s pretty cool. It means we can run a 45+ year old version of Unix on Windows, MacOS or any major distribution of Linux by running 1 Docker command.
When you’re done experimenting, all you have to do is run a different Docker command and your system will be back to pristine condition without any lingering dependencies.
The only requirement is you have Docker installed, so go ahead and install Docker now if you haven’t already. You can use Docker’s official install guides to get you going.
# Run the Docker Image
Lucky for us, Brian Bennett put together a GitHub repo that has a pre-made Docker image with everything configured. So all we have to do is run the commmand below and wait a few seconds to get started:
docker run --rm -it bahamat/unix-1st-ed
That should drop you into a :login: prompt, as seen below:
PDP-11 simulator V3.9-0
./simh.cfg> #!tools/pdp11
Unknown command
Disabling CR
Disabling XQ
RF: buffering file in memory
TC: creating new file
TC0: 16b format, buffering file in memory
Listening on port 5555 (socket 7)

:login:
# PDP-11 Simulator
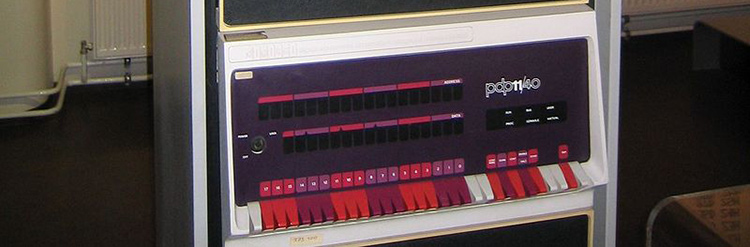
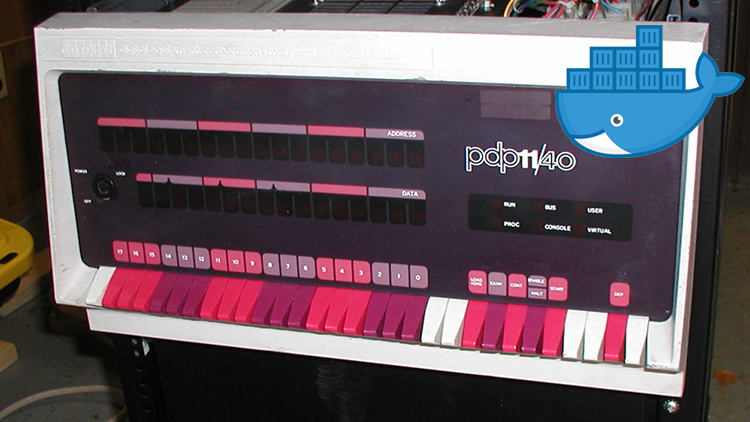
The PDP-11 was a computer sold back in the early 1970s to 1990s. You can read the original PDF brochure if you’d like, or if you want to research it in detail here’s a 300+ page manual.
It’s labeled as a “minicomputer” but it weighed about 100 pounds (45kg) and cost $10,800 back in the early 1970s. If you account for inflation that would be like spending $63,246 today.
But instead of having of buy one, we’ve ran a simulator. This is somewhat comparable to running an NES or game system emulator. It will give us the experience of using it, without needing the hardware.
Logging into the System
At the :login: prompt, type in root and press enter.
:login: root
root
#
You should now see a blinking cursor, we’ve successfully logged into the PDP-11.
At this point we’re ready to start running Unix commands and party like it’s 1972. The only problem is, Bash wasn’t released until 1989 so we’re stuck using the original shell.
That means things we take for granted today like being able to hit backspace, or move the cursor with the arrow keys won’t work. Give it a shot, try typing something and then move the cursor. You can’t. We’ll go over how to clear out invalid commands later.
There Were No Monitors Back Then
If you’re wondering why things like moving the cursor didn’t exist back then, you have to remember, it was a much different time in the early 1970s.
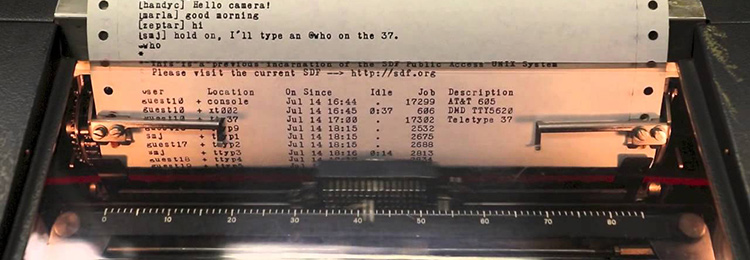
There were special typewriters called teletypes. You typed commands into it, and it communicated with the computer, and then the computer output its display directly onto a piece of paper. If you typed something into the system, there was no going back.
As an aside, this is how the echo command came into existence. You could tell the computer not to echo back some of your commands, which was quite handy for inputting passwords.
How crazy is that. A piece of paper was your monitor. You can see it in action in this Youtube video. Skip around to see how it worked.
Part of the Unix Philosophy states “No news is good news”. Now it makes sense. You wouldn’t want extra text to be printed out when things worked. That’s why most Unix programs output no extra information if they ran correctly.
TTY Anyone?
You’ve probably heard the term TTY before right? That stands for “TeleTYpewriter”.
That whole TTY system was modeled around these original teletypewriters. If
you want to know the nitty gritty details on how that works, there’s an excellent
write up of it in an article called “The TTY demystified”.
Onwards…
# Exploring Unix Circa 1972
Some commands we use today existed back then. For example you can run ls:
# ls
bin
dev
etc
tmp
#
You can even run ls -la:
# ls -la
total    7
 41 sdrwr-  6 root     60 Jan  1 00:00:00 .
 41 sdrwr-  6 root     60 Jan  1 00:00:00 ..
 53 sdrwr-  2 root    620 Jan  1 00:00:00 bin
 42 sdrwr-  2 root    250 Jan  1 00:00:00 dev
 43 sdrwr-  2 root    110 Jan  1 00:00:00 etc
114 sdrwr-  2 root     50 Jan  1 00:00:00 tmp
#
On a modern day system you could run ls --help to get the man pages for ls
but back then you couldn’t do such a thing. The idea of using -- flags didn’t
even come into existence until 1980 and it wasn’t considered a standard until
1992.
Investigating the /bin Directory
You can check out what’s available to run by going to the /bin directory.
The cd command didn’t exist yet because back then it was named chdir.
As an aside, if you make a typo or invalid command you have a few options. You could
run the invalid command and have the system yell at you, or you could enter in
the @ character, which was known as the “kill” character. Everything prior
to the kill character will be ignored.
For example foobar@ls -la would translate to ls -la. Try it out.
Run chdir /bin, followed by ls -la to list its contents:
# ls -la
total  228
 53 sdrwr-  2 root    620 Jan  1 00:00:00 .
 41 sdrwr-  6 root     60 Jan  1 00:00:00 ..
 95 sxrwr-  1 bin      16 Jan  1 00:00:00 :
101 sxrwr-  1 bin    2310 Jan  1 00:00:00 ar
 72 lxrwr-  1 bin    7582 Jan  1 00:00:00 as
112 lxrwr-  1 bin    5922 Jan  1 00:00:00 bas
 61 sxrwr-  1 ken    2860 Jan  1 00:00:00 cal
103 sxrwr-  1 bin     134 Jan  1 00:00:00 cat
...
There are 228 binaries to run. Some of which look familiar.
For example, we can output a list of users by using the cat command as so:
# cat /etc/uids
root:0
sys:1
bin:3
adm:3
jfo:4
ken:6
dmr:7
jack:10
peter:11
jay:12
bob:13
sun:14
lee:15
Doing Some Self Exploration
If you want to dig around the file system and try a few commands out, please do so. You can read the complete Unix 1st edition PDF manual.
Logging Out
When you’re done playing with everything you can logout by pressing CTRL+E.
That’s going to drop you into the PDP-11 simulator prompt:
Simulation stopped, PC: 007332 (MOV (SP)+,25244)
sim>
You can choose to explore what the simulator has to offer by running help followed
by pressing enter, or if you want to quit then run quit instead.
Delete the Docker Image
This step is optional, but if you want to clean up any disk space used by Docker
you can delete the Docker image we ran before by running
docker image rm -f bahamat/unix-1st-ed.
The benefits of keeping it around is the next time you start it, it will start in milliseconds because it won’t have to download this Docker image again. If you delete it now, Docker will simply download it again if you run it in the future.
# Closing Thoughts
Going through all of this really makes you think about how good we have it now.
I bet people from the 1970s were really good spellers because not being able to move your cursor is pretty brutal.
Did you discover anything interesting inside the simulator? Let me know below.
It’s also worth noting, you can also use Docker to run web applications and other applications too. If you want to learn how to use Docker in great detail then sign up to the free email course below, or take my complete Dive Into Docker video course at your own pace.