Build a Home Made Standing Desk for 50 Dollars in 10 Easy Steps
Learn exactly how to build a custom standing desk without being a handyman. No saws required!
I spend a lot of time sitting as a software developer, and while I do walk about 2-3 miles a day which I spread into 3 breaks through out the day, I don’t think it is enough daily activity.
Below are instructions for how you can build your own customized standing desk for about $50 and you won’t need to be a handyman to do it.
# What About the Famous $22 Standing Desk?
In case you haven’t read it already, I recommend skimming this article: http://iamnotaprogrammer.com/Ikea-Standing-desk-for-22-dollars.html
It’s a low maintenance way of creating a standing desk for a little over 20 bucks, but at the time of writing this article it seems like one of the components no longer exists.
I think it’s pretty nice but I wanted my standing desk to match my desk’s design and I also wanted it to be ergonomic for my specific height without having to prop things up with books.
# Material List
Everything can be purchased from Home Depot and it will run you about $50. I recommend reading the entire article before placing any orders because you may want to make substitutes based on your desk’s height or your personal height.
Necessary
The shelves listed below come in many different colors. Chances are you will be able to find colors that match your desk.
- $6.28 (4) 12" x 24" Decorative Shelf
- $7.78 (2) 12" x 36" Decorative Shelf
- $3.77 (1) 3" L-bracket (4 pack)
- $1.18 (1) 1" 3/4ths Flat head wood screws (8 pack)
- $1.18 (1) 3/4ths" Flat head woof screws (12 pack)
- $1.88 (2) 3/8ths" Flat head wood screws (12 pack)
Optional
- $3.98 (1) 2.8oz clear Silicone
Additional Supplies
I’m assuming you already have these or can borrow them from someone.
- (1) Drill
- (1) Phillips head screw-driver
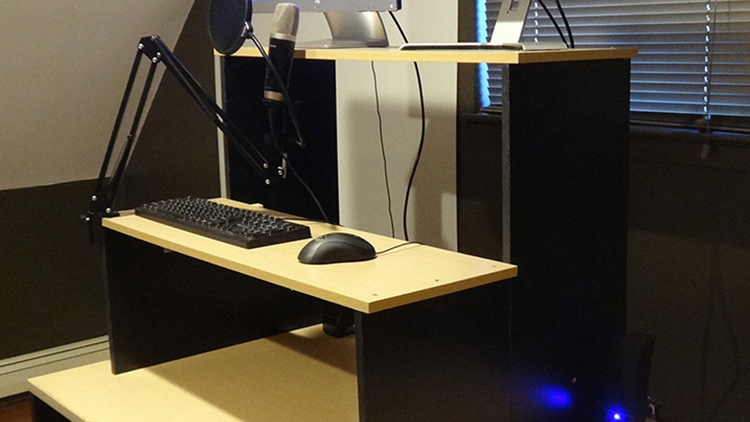
# Prototype Design
The pictures you see are what I would describe as the prototype model because I made a few adjustments to it after I built most of it.
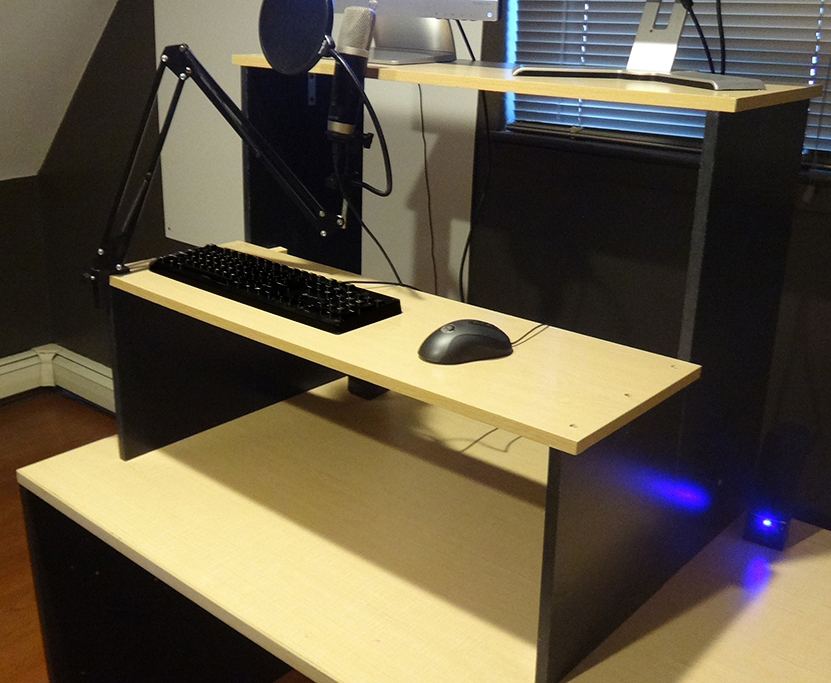
For example in the original design I wanted the top and bottom shelves to be decoupled, this way I could chop a couple of inches off the top shelf if I were to buy a new monitor that were bigger.
This had a few issues. The sides are way too tall to be stable. I even added a beam to lock the sides together and this helped but I ran into a second issue.
The second issue was the floor in my home office was not square. I had never noticed it before when working on a normal desk but it’s quite lop sided.
This was a big problem because the top shelf wobbled a lot. The only way to fix this, short of making complicated degree-based cuts off the bottom to match the slope of the desk was to combine both shelves together and make it 1 unit.
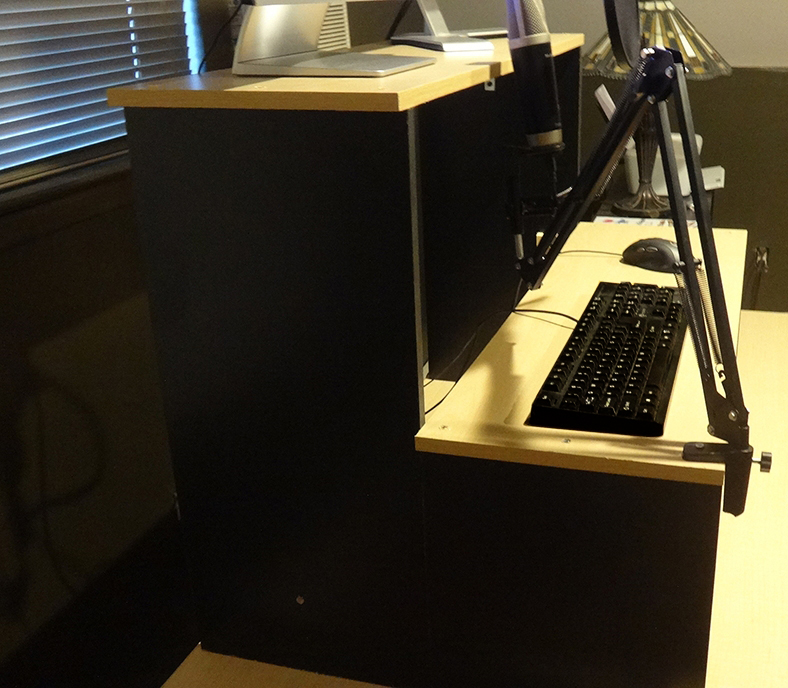
This makes it very stable, but if I knew I was going to combine them in the end I would have designed it differently. This guide is going to go over designing it with the single unit design from the start.
The desk you’ll make will end up being more sturdy than mine.
# Build Instructions
Now that you know what we’re building, let’s build it.
General Drilling Tips
You’ll be required to pre-drill a few holes in the upcoming steps. You’ll want to use a countersink drill bit to ensure that the top of the screw ends up below the shelf.
If you don’t have one of these bits you can either buy one for about $9 on Home Depot or use a knife/razer to carve out the area for the screw head.
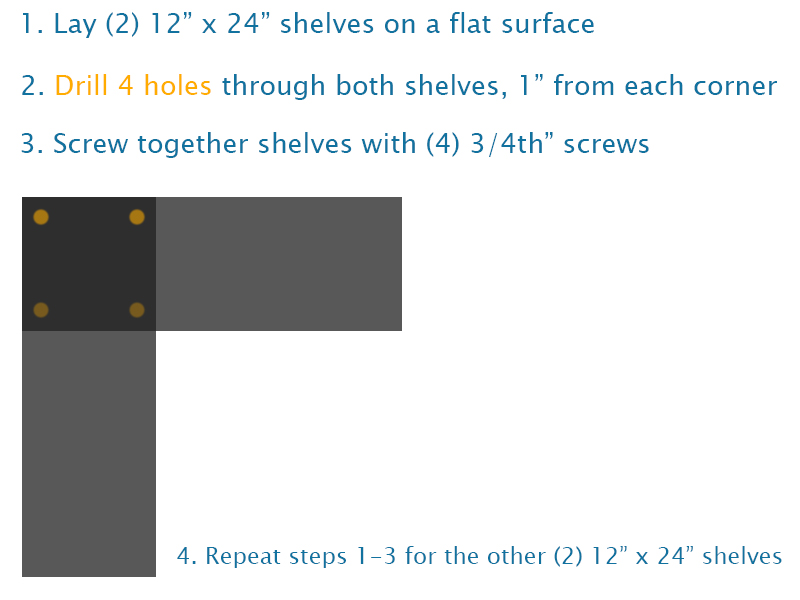
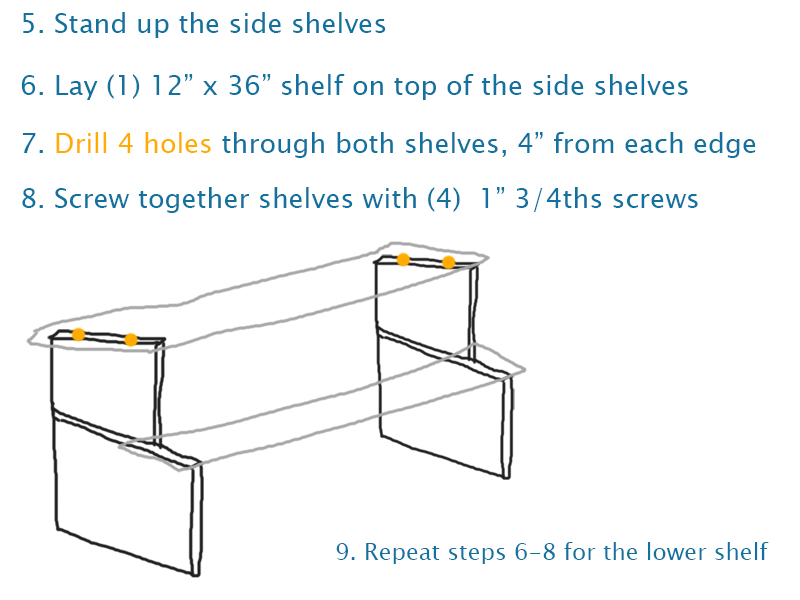
The Side Shelves
The Top Shelves
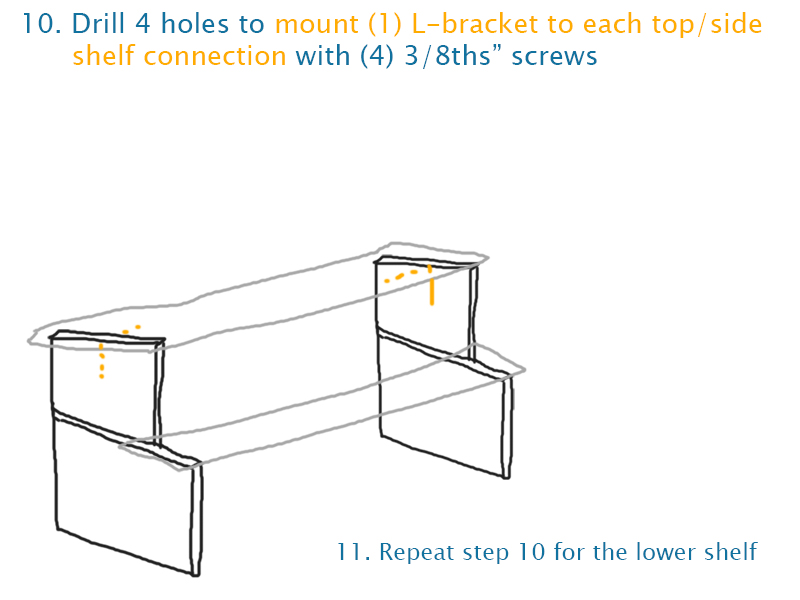
Mounting the L-Brackets
You’ll likely want to flip the unit over to perform this step.
Optional Stability
Depending on what your base desk is made of, you may want to stabilize the standing desk with clear Silicone. I recommend doing this for most desks because the last thing you want is everything to slide off the base desk.
This will prevent the standing desk from slipping forward, and the Silicone will be removable without ruining both the base and standing desk if you decide to move it.
Flip the unit over and apply a thin amount along the bottom edge of the standing desk side shelves (the edge that would be on top of your base desk).
IMPORTANT: Let it dry for about 10 hours before placing it onto your base desk!
Optional Finishing Touches
You could use putty or caps to cover the screw holes for the top shelves.
# Making Modifications
If 36" is too wide for your desk then feel free to drop down to 24" instead. The construction of the desk does not change. There’s even 48" and 72" shelves available but at that point I would question the stability of it with the current design.
Feel free to also use different sized side shelves if you want the standing desk to be shorter or taller based on your own personal height or base desk’s height. You will need to cut the shelves if you decide to do this but Home Depot will make the cuts for you at no charge. Just make sure you go in there with the correct measurements.
For reference my base desk is 36" tall and I’m 5'11" standing barefoot.
# Additional Costs for Any Standing Desk
There are a few things you may want to account for. Your monitor cables are most likely going to be too short unless your computer tower sits on your desk. Of course you’ll want to prop up your monitor(s) to see if your existing cords fit.
I picked up the following supplies from Amazon:
- $5.99 (1) 10ft HDMI cable
- $8.95 (1) 10ft DVI-D M to M cable
If you have wired devices then you may have some issues with wire management too when it comes to your keyboard and mouse. Of course this will depend on your set up, but it’s something to think about. You way want to consider USB extension cables.
I personally grabbed 2 of these from Amazon:
- $5.49 (2) 6.5ft USB extension cable