Launching WSL Programs from a Right Click Windows Menu
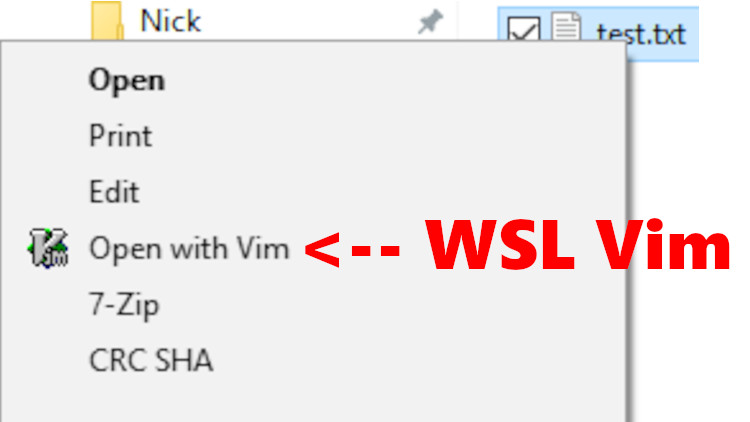
A common use case for this would be opening a specific file with terminal Vim by right clicking a file in Windows explorer.
I recently switched to using Vim as my primary code editor, and it’s currently running directly inside of WSL. It’s the terminal version of Vim, rather than running GVim directly from within Windows.
Since I spend most of my time in a terminal, I do most of my file browsing there too with a tool called ranger, but every once in a while I find myself in Windows explorer browsing through files and I want to be able to open a text file with Vim.
VSCode has a menu item added where you can right click a file and then open it with VSCode and that’s exactly what I wanted to replicate with the new set up.
With Vim, it’s a little more tricky to set up because it involves launching your WSL terminal, running a bash command and also transforming the Windows file path so it works inside of WSL. That’s what we’re going to cover in this article.
The cool thing about this strategy is it will work for all terminals and all programs you want to launch. So if you don’t use the same terminal as me, then all you have to do is adjust a few flags for your specific terminal, and when it comes to launching Vim, you could easily replace that with whatever app you want to launch instead.
# Putting Together a Command to Run
Before we create the right click menu item, we need to come up with the command to run. This would be the command to run after selecting the menu item.
3 components to launching and running a WSL command:
- The absolute path to your terminal’s binary
- Determining which flags your terminal supports
- The bash command you want to run
1. The Absolute Path to Your Terminal’s Binary
Nowadays I am using wsltty as my WSL terminal of choice. It doesn’t have the
lowest input latency like the default ubuntu.exe terminal, but the hot keys
for adjusting font sizes on the fly makes it a win for me as someone who
creates videos.
The path to this terminal can be found at
C:\Users\Nick\AppData\Local\wsltty\bin\mintty.exe. You will want to replace
Nick with your Windows user name.
That path is going to be different for each terminal so if you’re using a different terminal you’ll need to figure out where yours is located.
You can verify it works by copying your path and then hitting Win + R to
launch the Windows command runner, and then paste it in. After running it, you
should see a terminal window pop open.

In the case of wsltty, the terminal we’re actually running is mintty, but it has a WSL mode. We haven’t enabled that mode yet so you’ll get an error. That error is normal.
2. Determining Which Flags Your Terminal Supports
When it comes to wsltty you can go to C:\Users\Nick\AppData\Local\wsltty in
Windows explorer and see a bunch of files related to this terminal.
Some of the files you’ll see are shortcuts with a Linux penguin icon.
![]()
Right click the one that says Ubuntu-18.04 Terminal and go to properties.
Inside of the target box you’ll see a path that looks like this:
C:\Users\Nick\AppData\Local\wsltty\bin\mintty.exe --WSL="Ubuntu-18.04" --configdir="C:\Users\Nick\AppData\Roaming\wsltty" -~
This shortcut launches the terminal and places you in your WSL home directory. All we have to do now is run a specific bash command instead of loading the home directory.
But before we get into that, let’s talk a little more about these flags.
The --WSL flag loads a specific WSL distro and the --configdir is where you
can supply your config file. Those are both pretty self explanatory and are
specific to mintty.
However, the -~ looks a little magical to me, so I wanted to see what’s
available with mintty, so I hit Win + R and ran
C:\Users\Nick\AppData\Local\wsltty\bin\mintty.exe --help.
That loads up the help menu:
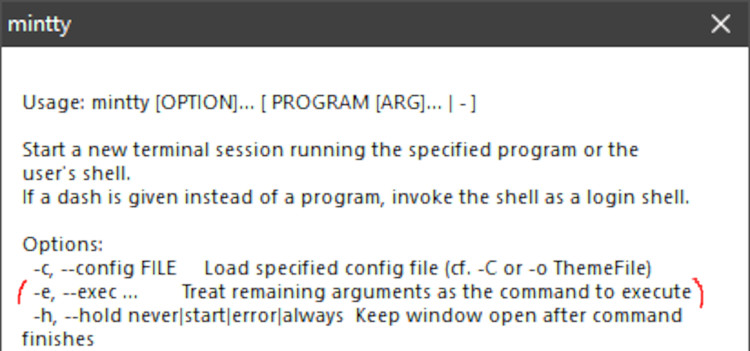
One of the options that caught my eye was -e which states that every
argument after -e will be treated as a command to execute. That is exactly
what we want.
What we want to do is spawn a new Bash session and then launch Vim. The reason
I wanted to load Bash is due to having a ~/.profile file which sources
a little script to make my Vim colors more accurate in 256 color mode. This is
part of the gruvbox
theme I use.
3. The Bash Command You Want to Run
Before we get into launching Vim, you can test out how to run any Bash command
by running this from your existing WSL terminal: bash --login -c "vim --version".
You should see version information about Vim, or whatever command you decided to run if you’re applying this to a different application.
So that takes care of running any Bash command. The only thing that’s left to do is instruct Vim to open a specific file instead of getting the version back.
Opening files with Vim:
For example, if you wanted to open your bashrc file from within WSL you would
run vim $HOME/.bashrc. The takeaway here is you supply the file path to
vim.
But let’s say you have a file in C:\Users\Nick\test.txt which is outside of
WSL. We can’t do vim C:\Users\Nick\test.txt.
Under normal circumstances, if you were running Vim manually inside of an
existing WSL terminal you would do vim /c/Users/Nick/test.txt, or perhaps you
would start it off with /mnt/c depending on where you mounted your C drive.
Converting Windows paths to WSL paths:
It just so happens when you install WSL, it comes with a tool called wslpath.
If you launch a WSL terminal and run wslpath you will get back the help menu.
$ wslpath
wslpath: Invalid argument
Usage:
    -a    force result to absolute path format
    -u    translate from a Windows path to a WSL path (default)
    -w    translate from a WSL path to a Windows path
    -m    translate from a WSL path to a Windows path, with '/' instead of '\'

EX: wslpath 'c:\users'
The main thing to note is the -u flag. It’s the default option and it will
translate a Windows path to a WSL path. That means we can run
wslpath 'C:\Users\Nick\test.txt'.
$ wslpath 'C:\Users\Nick\test.txt'
/c/Users/Nick/test.txt
The quotes are necessary. Otherwise the path will be malformed, but you should
get back a properly formatted WSL path that looks like /c/Users/Nick/test.txt.
Putting it all together to create our command:
Now we know how to run any Bash commands we want, and we also know how to automatically convert file paths. Let’s put them together.
Our command will look like this: bash --login -c "vim $(wslpath 'C:\Users\Nick\test.txt')"
Which we can run in a WSL terminal and it should open that file. Feel free to close it.
Now we’re ready to put everything together to create our command:
C:\Users\Nick\AppData\Local\wsltty\bin\mintty.exe --WSL="Ubuntu-18.04" --configdir="C:\Users\Nick\AppData\Roaming\wsltty" -e bash --login -c "vim $(wslpath 'C:\Users\Nick\test.txt')"
If you copy / paste that and run it from Win + R it should open wsltty, load
Vim and then display the empty test.txt file.
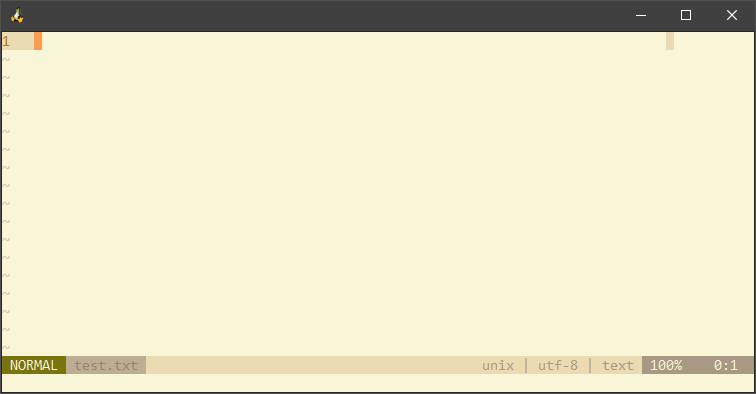
I’ve edited out the title of the terminal window but yours should look a little
crazy. It likely has information about wslbridge and other things that have
no use to us.
Adding finishing touches by customizing the terminal window’s title:
If you look back at the wsltty help menu, it has another flag called -t which
lets you set the title of the terminal window.
We can add that to our command before the -e flag like so:
C:\Users\Nick\AppData\Local\wsltty\bin\mintty.exe --WSL="Ubuntu-18.04" --configdir="C:\Users\Nick\AppData\Roaming\wsltty" -t "C:\Users\Nick\test.txt" -e bash --login -c "vim $(wslpath 'C:\Users\Nick\test.txt')"
Now if we run the command again, it will show the file path in the title bar.
This is great. We have our command. The only problem now is it’s hard coded to a specific file, but we’ll see how to make that dynamic based on what file was right clicked.
# Creating the Right Click Menu Item
We’ll have to open up the Windows registry, which you can do by hitting
Win + R and then running regedit.exe. You’ll also need to become an admin
for this.
- Navigate to
HKEY_CLASSES_ROOT\*\shellby expanding the folders on the left - Right click
shelland go to New, then select Key - Name your key
Vimor whatever makes sense for your app - Left click your new
Vimkey then click the right hand side’s(Default)item - Right click the
(Default)item and go to Modify - Enter in
Open with Vimfor theValue datafield and hit OK - Right click your new
Vimkey and go to New, then select Key - Name your key
command - Left click
commandthen click the right hand side’s(Default)item - Right click the
(Default)item and go to Modify - Paste your final command in the
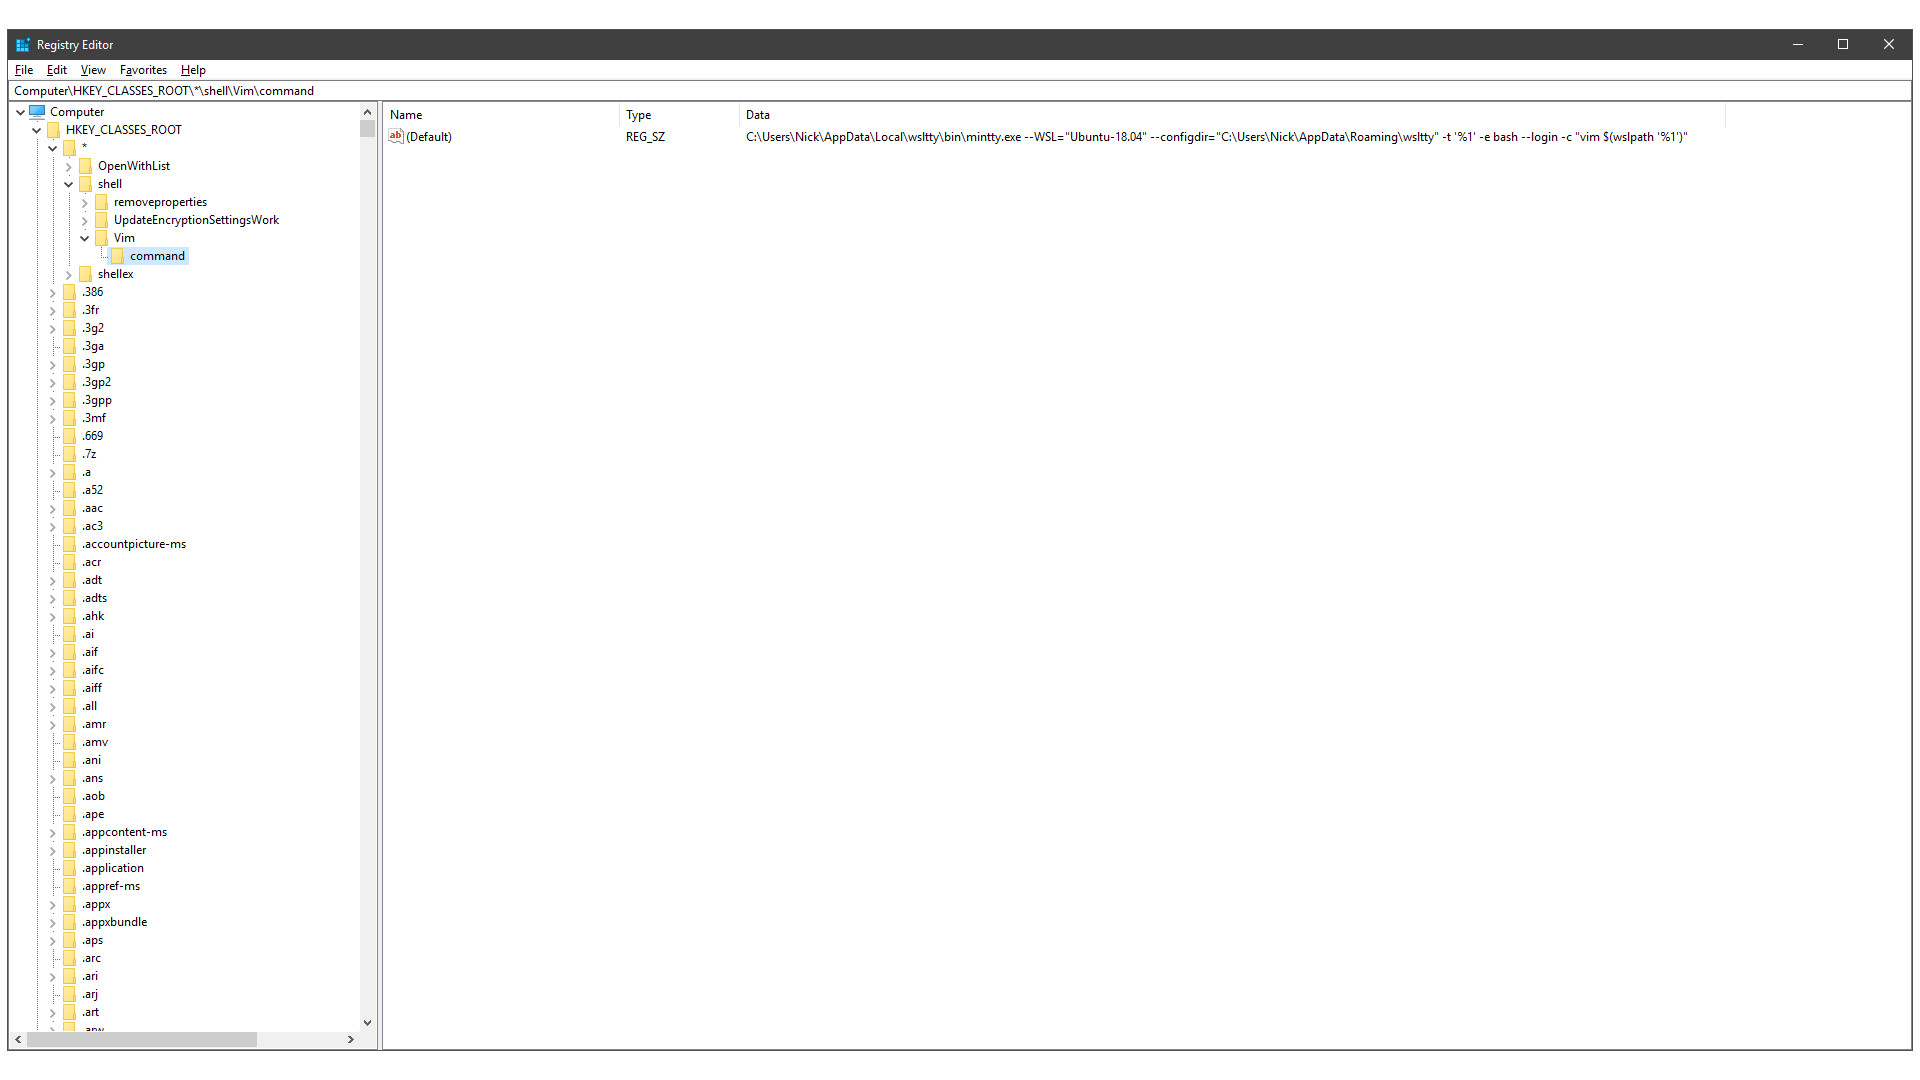
Value datafield - Change
C:\Users\Nick\test.txtto%1in both spots and click OK
After all of those steps, it should look like this:
Now if you open Windows explorer and right click any file, you should see an
“Open with Vim” menu item. If you click it, it will open that file in Vim with
the correct file path and terminal title. The %1 gets the current path of the
file you right clicked.
If you want to change the wording of the menu item, change step 6.
Adding finishing touches by showing a Vim icon:
The icon you choose to use will depend on what you’re running. You can download the Vim icon file from Github at https://raw.githubusercontent.com/vim/vim/master/src/vim.ico
Save it somewhere on your computer. I put mine in D:\media\assets\Vim.ico.
Now we’ll have to go back to the Windows registry to set the icon.
- Navigate to
HKEY_CLASSES_ROOT\*\shellby expanding the folders on the left - Right click
Vimand go to New, then select String Value - Enter in
Iconas the Name and hit enter - Right click the
Iconitem and go to Modify - Paste the path to your icon in the
Value datafield and click OK
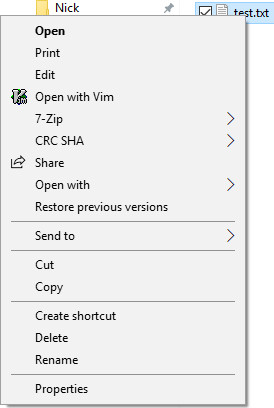
![]()
The next time you right click a file in Windows explorer you should see your icon. Done!
So that’s how you can run any WSL tool or program directly from right clicking a file.
# Launching WSL Programs as Custom Shortcuts
Since we’ve gone through all of that, it’s also worth mentioning you can do what we just did with custom commands to create shortcuts to any WSL tool or program.
For example, instead of opening a terminal that loads Bash (the default), you can create a new shortcut for your terminal (similar to the wsltty Ubuntu 18.04 shortcut from before), goto the properties and adjust the target to run something like a Python interpreter.
You could even change the icon from that same menu, no regedit.exe required.
Now you have a custom shortcut that you can click to directly open a Python interpreter.
You can even pin these shortcuts to your task bar.
Which programs are you going to run this way? Let me know below!