Using WSL and MobaXterm to Create a Linux Dev Environment on Windows
The Windows Subsystem for Linux (WSL) is ready for prime time. You no longer need a VM to run graphical Linux apps on Windows.
Quick Jump: Why Switch Away From VMware and Unity Mode? | WSL, ConEmu and MobaXterm to the Rescue | Getting Docker Up and Running | What's the Verdict?
This article was originally written in 2017, so lots of things have changed. I’ll try to point out those updates during the article. Just letting you know ahead of time!
In mid 2020 I also recorded a video recap of all of the tools I use and how to install them. If you’re interested in that video you can check it out here. I would consider it to be the successor to this blog post.
From about 2012 to 2017 I was using VMware’s Unity mode to seamlessly run Linux applications on Windows without having to dual boot.
Overall, it was a pretty solid set up but it had a few annoying issues. It got to the point where I woke up one day and backed up my source code and then rage uninstalled VMware followed by deleting the 100GB VM image.
There was no going back. I had to find a new solution.
If you’re interested in a demo video showing the setup, check out this article.
Spoiler alert: This new set up is the best way I’ve come across to run both Linux and Windows together. If you’re on Windows and want to also run Linux tools (even graphical apps and Docker) you’ll learn how to set everything up by reading this article.
Why Switch Away From VMware and Unity Mode?
Before I go into how I set up the new development environment I want to talk about the issues with the VMware set up because I think the “why” is equally as important as the “how”.
If you want to jump straight into the “how”, then click here.
Locked Into Using Xubuntu 14.04
VMware officially dropped support for running Linux guests inside of Unity mode and Xubuntu 14.x is the last version that supports it.
The support for other flavors of Ubuntu were pretty poor too. Most of them had graphical anomalies that would make it unusable and Xubuntu was the only distro I found that worked.
I have nothing against Xubuntu 14.x but at the time of this article, the 16.x release has been out for ages and I don’t want to be stuck using 14.x when 18.x eventually rolls along.
I’m a practical person and I don’t mind using older software but I don’t want to base my development environment on an unsupported distribution of Linux.
File System Conflicts
With the VM set up, I kept all of my source code directly inside of the VM and then mounted one of my data hard drives into the VM as well.
I did that because having my source code inside of the VM meant having native performance. I used the mounted drive as a way to backup my source code and also occasionally move files between the VM and Windows.
This might sound reasonable but this is my primary development workstation and most projects I work on have components that are not just source code.
For example my Docker course’s page has images too, and these images were made with an image editing tool, but the website’s source code was inside of the VM.
That means I had to open a graphic tool in Windows, create the image, save it onto the shared data drive and then copy it from there to the image folder inside of the source code’s folder for the Docker website.
That might not seem annoying, but it really is. It feels like you’re battling 2 file systems and you spend a lot of time micro-managing it.
I could have gotten around that by just having all of my source code live on my data drive and mount everything in because VMware’s folder mounting performance is actually really good, but in the end, I didn’t do that because hey, I’m an idiot haha.
MS Windows Doesn’t “See” the Linux Driven Unity Mode Windows
Windows has a built in ability to snap and tile windows together but it treated windows created by Unity mode as unknowns, meaning, it completely ignored them.
If I wanted to arrange application windows from both Linux and Windows I had to do it by hand and this was something I ended up doing a lot.
Another related issue was that Unity mode driven windows didn’t have the same liquid smooth feel to them because Windows couldn’t apply whatever magic it does to make the UI feel smooth.
The Frikken Shift Key
So apparently there’s this 9 year old bug where the shift key would get stuck quite frequently and there’s no fix to it. Unity mode only works with VMware Player which means I couldn’t even upgrade the VMware software to see if it ever got fixed because VMware Workstation disabled Unity mode for Linux guests entirely.
You can’t imagine how bad this is, and it’s the main reason I wanted to look for an alternative because it gets in the way of doing live coding for my courses and it happens so often.
Imagine typing <% or {{ and literally (and I mean literally) 50% of the time the shift key would get stuck in the enabled state and when you goto type, everything COMES OUT IN CAPS and when you hit the up arrow, it selects the full line.
This was super disruptive and the “fix” was to have to hit the shift key about 15 times very quickly to unstick it. If this happened twice a day I could deal with it, but this was happening twice per minute. This was unacceptable and I question how I survived so long.
I had PTSD every time I tried to open a template tag or use a bracket.
All of the above issues are resolved with the set up explained below!
WSL, ConEmu and MobaXterm to the Rescue
My end goal is to be able to run both command line and graphical Linux applications under Windows without having to dual boot and that’s what you’ll be able to do after setting everything up. You won’t even need Cygwin or a Virtual Machine too!
It needs to be rock solid and fast without compromises.
Having used this set up for over a full year I can confidently say it all works great. Clipboard sharing is flawless, typing is effectively instant, moving windows around feels liquid smooth, Docker runs fast enough to not be distracting and it’s stable.
All of the tools mentioned below (besides Windows) are free and / or open source.
To follow along you’ll want to be using the Fall 2017 version of Windows or later. It doesn’t matter if you’re using the Home, Professional or Enterprise editions, they all work.
Setting Up Windows Subsystem for Linux (WSL)
Prior to the Fall 2017 version of Windows, WSL was also known as Bash for Windows but now it’s simply called WSL. Microsoft also supports more than Ubuntu too.
You can choose to run Ubuntu, Fedora and SUSE. More distros are on the way. You can even run them together with their own separate file systems.
I personally run Ubuntu but ultimately it won’t matter which one you use because they should all work. I say “should” because I haven’t personally tried the other distros, but nothing about them should cause anything to fail unless the distro itself is completely hosed.
WSL is going to give us access to running Linux tools within Windows. Let’s get that running.
1. Enable WSL
Do a search for “Windows features” and then enable WSL:
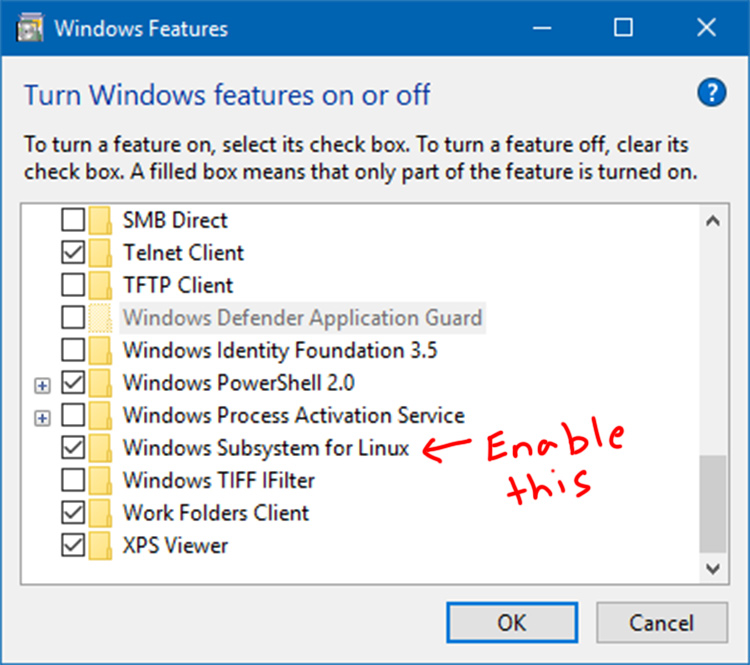
At this point you’ll need to reboot, so go do that because you’ll have to in order to proceed. Unfortunately this isn’t one of those “should” reboots, it’s a “must”.
2. Download, launch and install a distribution of Linux
I recommend Ubuntu but you can pick whatever you think is best for you.
Just click the “Get it now” button (or similar) to download it.
Once it’s downloaded, then launch it and agree to install it.
3. Create a user
After it installs it will eventually ask you to create a new UNIX user:
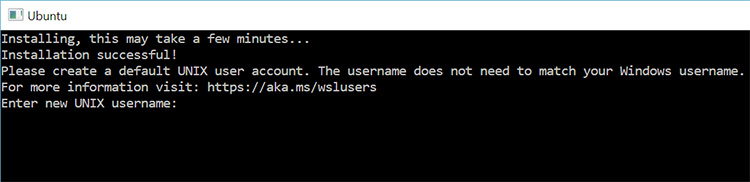
I recommend using a lowercase version of your Windows user. For example, my Windows user is “Nick”, but I used “nick” for the Ubuntu user.
Launching WSL in the future
At this point WSL is all set up. You could install things like Ruby, Python, NodeJS or whatever tools you would normally install and follow the Ubuntu installation instructions.
Graphical apps won’t work yet, but before we get into that, we need to deal with using a proper terminal because the default Microsoft terminal is rough. If you happen to like it, you can do a Windows search for “bash” to launch it in the future, but I don’t think it’s worth using.
Setting Up ConEmu (Terminal for Windows)
Update: Nowadays I’m using the Microsoft Terminal. It’s quite good!
I spent a lot of time researching different terminals for Windows and I eventually came to the conclusion that ConEmu has all the right things.
1. Here’s what makes ConEmu a good choice
- It’s open source
- It supports tabs, split panes and sessions
- Search and hotkey support are first class citizens
- You can use it for both PowerShell and WSL (Bash)
- It’s ridiculously configurable and rock solid
Honestly, I don’t even feel the need to use tmux anymore (but you could still install tmux inside of WSL if you wanted). I’m impressed and am thankful that ConEmu exists.
2. Installing ConEmu
Just goto their GitHub page and download it.
I highly recommend switching to the “Latest” release in the settings once you install it. It’s stable and often has useful features added to it. That will be in the General -> Update area of the settings under “Preferred release type”.
3. Making ConEmu Default to WSL
When opening a new ConEmu instance you can have it default to WSL which is what I’m doing since I don’t really use PowerShell or the regular Windows CMD prompt.
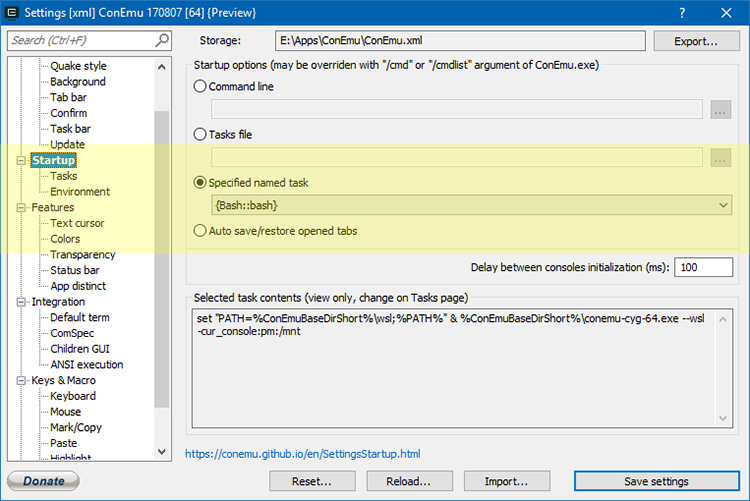
To do that, just goto the settings -> Startup -> Specific task name screen and pick {Bash::bash} from the drop down list and save the settings.
Feel free to look around at the other settings too because you may want to tweak a couple of things. For example pasting multiple lines requires you to right click your mouse or use Shift+Insert instead of CTRL+V, where as CTRL+V is only used to paste 1 line. You may want to change that behavior.
Setting Up MobaXterm to Run Graphical Linux Apps
Update: I switched to using VcXsrv as an X-server instead of using MobaXterm. If you want to do the same, you can skip steps 1 and 2 here, but you’ll still need to do step 3.
MobaXterm has a lot of different features but the one we care about is that it can run an X server session. This is what will allow us to render the display of an application running in Linux inside of a Windows powered window.
1. Installing and running MobaXterm
Head over to their website and download the free version, then install it.
2. Make sure X server is running
You’ll always need to run MobaXterm, and in the top right corner of the app there’s an “X server” button. Make sure it’s running. If it says it’s not running then click the button, that’s it.
3. Set the DISPLAY in WSL
We need to configure WSL to send the display of its graphical apps over to Windows. If we skip this step, then our graphical apps will attempt to load natively inside of WSL and nothing will show up.
To do that, we need to set the DISPLAY environment variable within WSL and we’ll do it in our .bashrc file so it’s always set whenever we open a terminal.
Run nano ~/.bashrc and then add this to the bottom of the file and save it:
# Using WSL 1? Then use this.
export DISPLAY=:0

# Using WSL 2? Then use this instead.
export DISPLAY="$(/sbin/ip route | awk '/default/ { print $3 }'):0"
The syntax is HOST:NUMBER. In our case we can omit the host and it will bind the display over a local Unix socket. WSL knows how to make this work, so don’t worry about it.
The 0 is the display number which would be the first monitor of the system in the context of WSL. Again, we don’t need to worry about this because once the window is open and running, you will be able to move it across multiple monitors without issues.
To apply the changes run source ~/.bashrc from your WSL terminal.
4. Changing how the clipboard works
Update: If you’re using VcXsrv instead of MobaXterm you can enable clipboard sharing while clicking through the configuration menus, or head over to my dotfiles repo which has a config file you can put into your Windows start up folder to have this applied on every time you boot up.
By default MobaXterm will copy text on select from within WSL and that’s definitely not the expected behavior of how copying text works, especially when you would want to copy and paste text between WSL and Windows.
Initially I thought the clipboard may have been busted with MobaXterm but a little exploring in the settings fixed it immediately.
Goto the Settings -> X11 tab and then change the clipboard drop down box to be disable “copy on select. Once you do that and save the changes your clipboard will work as expected.
Nice!
5a. Testing out VSCode inside of WSL
Update: You can skip all of this and just use VSCode’s WSL integration now.
If you’re running the Windows 10 Spring 2018 update, you’ll be happy to know that VSCode can now run inside of native WSL. Prior to this release that wasn’t possible.
Personally I run VSCode directly through Windows nowadays but I thought I’d include how to set it up inside of WSL since it wasn’t immediately obvious.
If you’re using Ubuntu you can follow these steps:
# Download the Linux .deb package from: https://code.visualstudio.com/download

sudo apt-get install libgtk2.0-0 libxss1 libasound2
sudo dpkg -i <the_file_you_just_downloaded>.deb
sudo apt-get install -f
You need libgtk2.0-0 libxss1 libasound2 because VSCode depends on them and they are not installed by default with the WSL Ubuntu distro.
Once everything is installed you’ll be able to run code . from WSL and you’ll be greeted by a nice looking VSCode editor. Congrats, you’re all set up!
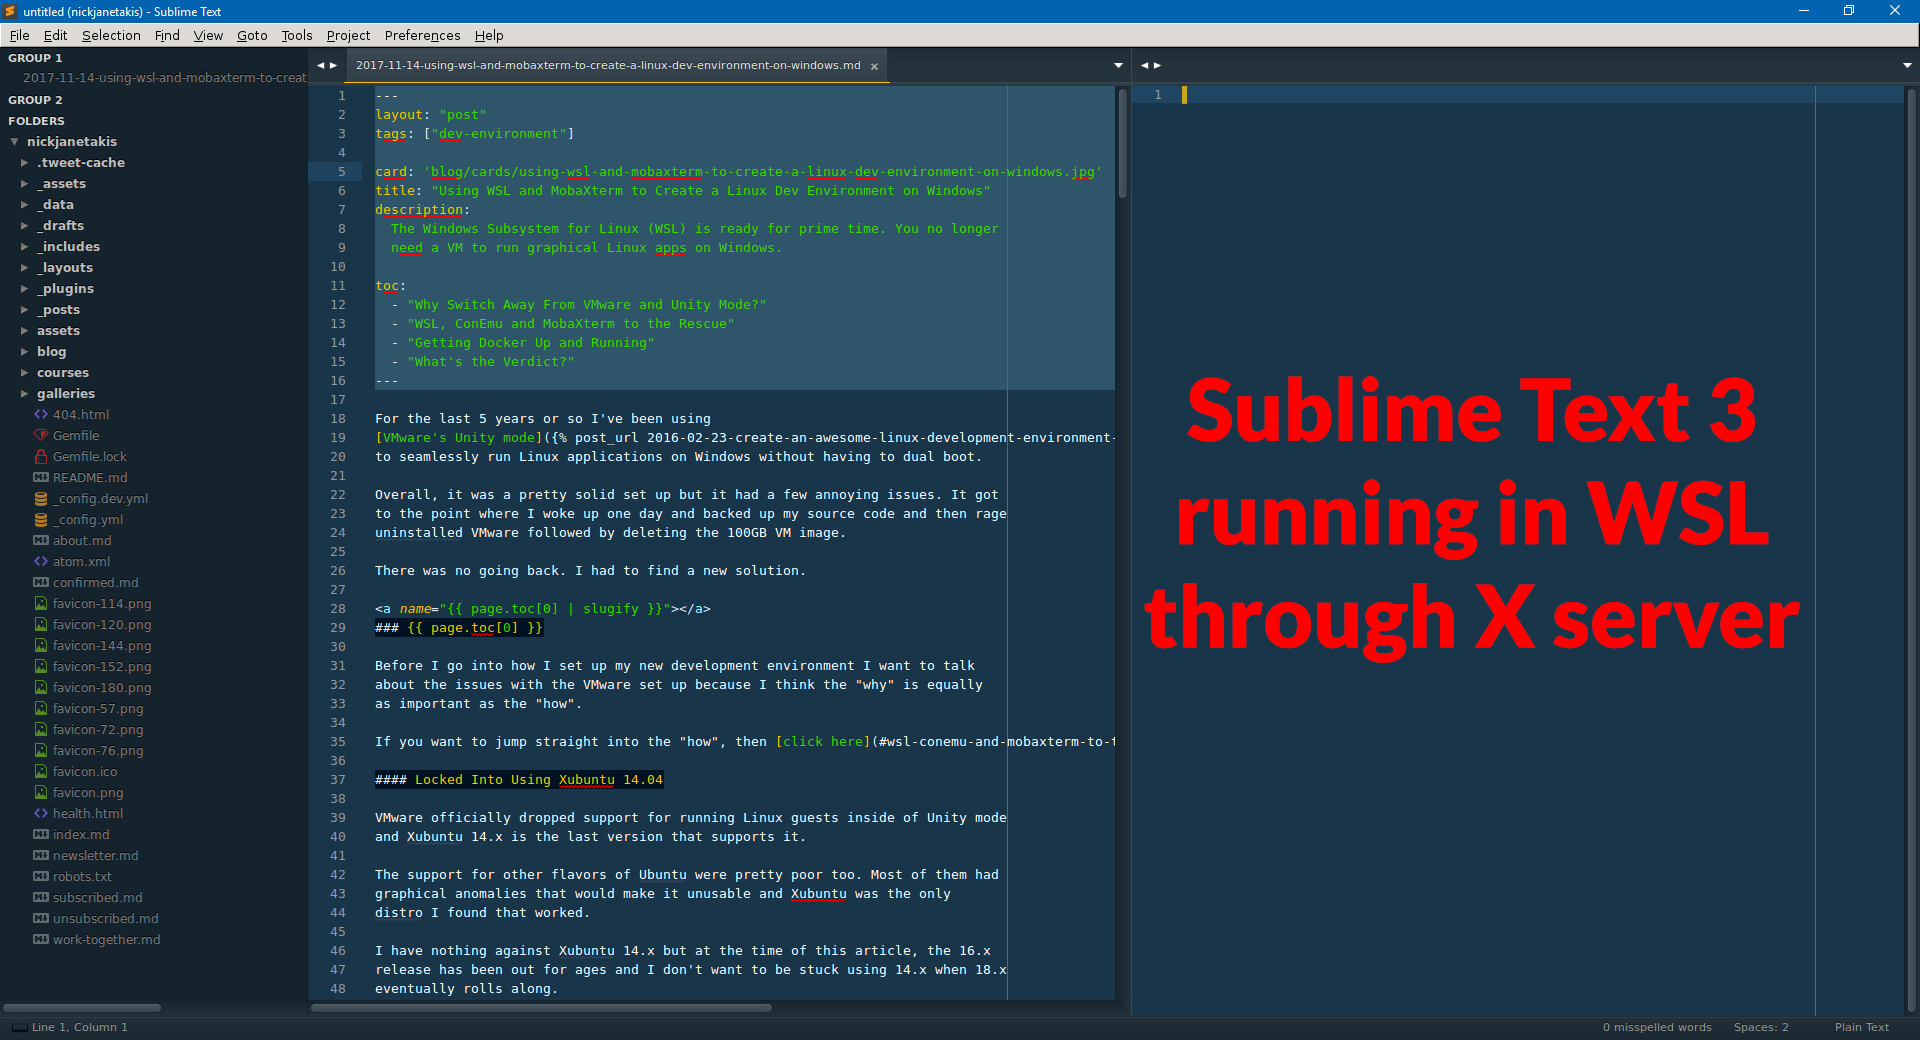
5b. Testing out Sublime Text inside of WSL
If you’d rather use Sublime Text instead of VSCode, that’s cool.
I used Sublime Text for a really long time before I eventually switched over to VSCode. They are both solid editors. I just happen to like VSCode in 2018+.
If you go with Sublime and are using Ubuntu you can follow these steps:
wget -qO - https://download.sublimetext.com/sublimehq-pub.gpg | sudo apt-key add -
sudo apt-get install apt-transport-https
echo "deb https://download.sublimetext.com/ apt/stable/" | sudo tee /etc/apt/sources.list.d/sublime-text.list
sudo apt-get update
sudo apt-get install libgtk2.0
sudo apt-get install sublime-text
Installing libgtk2.0 is necessary because it’s not installed by default with the WSL version of Ubuntu. Without this package, then Sublime wouldn’t start up because that’s how it renders its UI, so if you didn’t use Ubuntu, you will need to install that package on your distro too.
Once all of that is set up you can run subl . from WSL and you should be greeted by the Sublime Text editor in its own floating window. Congrats, you’re all set up!
Getting Docker Up and Running
I have another article that’s dedicated to setting up Docker to work with WSL. All of my web applications are ran through Docker and it performs brilliantly in development with this set up.
What’s the Verdict?
I’m really happy with this set up and short of anything crazy happening in the computer world I can see myself using this set up for the next 5 or 10 years.
I also want to give a shout-out to the developers of Microsoft, MobaXterm and ConEmu for making this combination possible. I finally feel like I’m getting the best of both worlds without wanting to constantly look for an alternative.
For someone who makes software developer related courses, I can’t run native Linux because no video recording / editing tools exist on Linux that’s comparable to Camtasia.
Are you using this set up? Let me know how it goes in the comments below!